
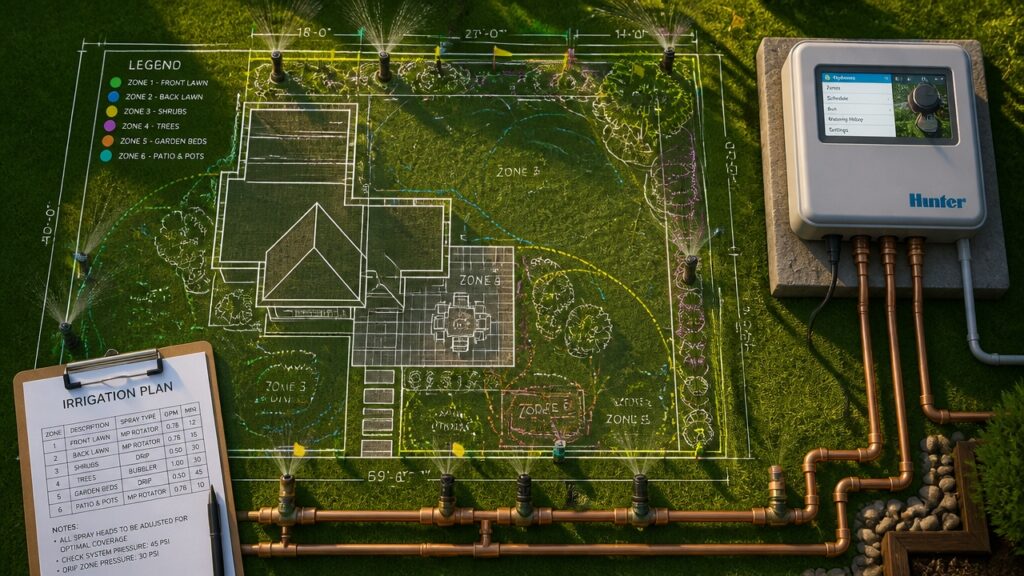
Walking through a yard with brown patches next to lush green sections tells you something is wrong with the sprinkler setup. The frustration of wasted water and dead spots doesn’t have to be your reality.
A properly designed system starts with understanding a few key basics that most homeowners miss entirely. Water pressure, yard layout, and what you’re actually trying to grow form the backbone of any sprinkler plan. Different plants need different amounts of water, and your water pressure determines which sprinkler heads will actually work in your space. Getting these details right from the start saves you from expensive fixes later on.
Spacing and zoning might sound technical, but they’re really just common sense applied to your yard. When you zone your system, you’re grouping plants with similar water needs together, which means some areas run on different schedules than others. This simple step prevents both the dry patches that brown out your lawn and the overwatering that wastes money on your water bill.
The good news is that building an efficient system doesn’t require professional expertise. Once you understand these foundational principles, you can create something that actually works for your specific yard.
The result is a system that keeps your landscape healthy while using less water and costing less to operate each month.
What Your Water Pressure Tells You About Sprinkler Choices
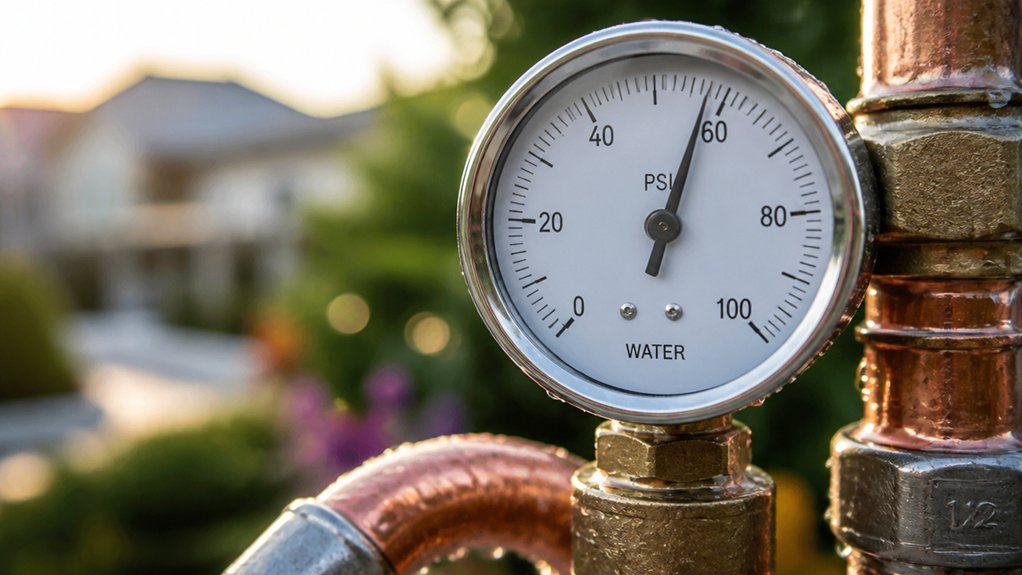
Water pressure is a critical factor that determines which sprinkler types will work effectively in a given landscape. Most residential systems operate between 40 and 80 pounds per square inch, or PSI.
Low-pressure systems, typically under 40 PSI, require drip irrigation or soaker hoses. These deliver water slowly and directly to plant roots, minimizing waste. Medium-pressure systems, ranging from 40 to 60 PSI, accommodate pop-up spray heads and oscillating sprinklers. High-pressure systems exceeding 60 PSI support impact sprinklers and rotor-style heads, covering larger areas effectively.
Homeowners should measure their water pressure using a gauge attached to an outdoor faucet. This measurement guides sprinkler head selection, guarantees adequate coverage, and prevents system damage from pressure fluctuations or incompatible equipment.
Choose Sprinkler Types Based on Lawn Layout and Water Pressure
Selecting the right sprinkler type requires matching equipment to both lawn shape and available water pressure. Rectangular lawns typically work well with spray heads, which distribute water in fixed patterns across defined areas. Irregularly shaped yards benefit from rotary sprinklers, offering adjustable arc coverage for corners and tight spaces.
Low-pressure systems, below 40 PSI, function best with rotary models and micro-sprinklers that operate efficiently without excessive water loss. Higher pressure systems, exceeding 60 PSI, accommodate spray heads and impact sprinklers effectively. Zone layout matters notably, as clustered sprinkler types prevent pressure drops and uneven watering.
Consider soil type and plant spacing when finalizing selections. Matching pressure capabilities to sprinkler specifications guarantees consistent coverage, reduces water waste, and extends equipment lifespan.
Design Sprinkler Spacing to Eliminate Overlaps and Dry Spots
Proper spacing forms the foundation of effective sprinkler coverage, directly determining whether a lawn receives uniform water distribution or develops problem areas. Sprinkler heads should be positioned so their spray patterns overlap slightly, typically 50 to 60 percent, creating consistent moisture across the entire yard.
Spacing depends on spray radius and water pressure specifications provided by manufacturers. For example, rotary sprinklers with a 30-foot radius require different placement than fixed spray heads covering 15 feet. Technicians calculate spacing by mapping coverage zones and identifying gaps where water fails to reach.
Adjusting head positions prevents both overwatering in overlap zones and underwatering in gaps. Proper spacing reduces runoff, conserves water, and promotes even grass growth throughout the landscape.
Zone Your Sprinkler System for Consistent Lawn Watering
Creating separate zones within a sprinkler system allows different areas of the lawn to receive water on independent schedules, accommodating varying soil types, sun exposure, and plant water needs.
Homeowners should group lawn sections based on their watering requirements. Shaded areas typically need less water than sun-exposed zones, while sandy soil requires more frequent irrigation than clay soil. A front yard zone might operate separately from a backyard zone, allowing each to run on its own timer.
Zoning also prevents overwatering in one area while another remains dry. A typical residential property might use two to four zones, depending on lawn size and landscape variation. Controllers manage each zone independently, adjusting run times and frequency as needed throughout seasons.
Match Valve Size to Water Pressure and Flow Rate
Once zones are established and operating independently, the sprinkler valves controlling water distribution must match the system’s water pressure and flow rate. Water pressure, measured in PSI (pounds per square inch), determines valve selection, as undersized valves restrict flow while oversized valves cause uneven coverage. Most residential systems operate between 40–80 PSI.
Flow rate, measured in GPM (gallons per minute), indicates how much water moves through the valve simultaneously. A valve rated for 10 GPM cannot handle 15 GPM without performance issues. Homeowners should check their municipal water supply specifications, then select valves rated appropriately for those conditions. Matching these specifications guarantees efficient water distribution across all zones and prevents pressure-related damage to sprinkler heads and connecting pipes.
Common Layout Mistakes That Waste Water and Money
Even well-designed sprinkler systems fail when layout mistakes undermine their efficiency. Homeowners commonly place sprinkler heads too close together, creating overlapping coverage zones that waste water through redundant irrigation. Conversely, spacing heads too far apart leaves dry patches in the landscape, requiring additional watering cycles and increasing overall consumption.
Poor zone planning represents another frequent error. Grouping plants with different water needs on a single zone forces homeowners to overwater drought-tolerant species or underwater water-hungry plants. Placing sprinkler heads near slopes causes runoff before water penetrates soil adequately.
Failing to account for obstacles like trees and structures blocks water distribution patterns, reducing coverage efficiency. These layout errors compound over time, resulting in higher water bills, uneven plant growth, and wasted resources that proper initial planning prevents.
Adjust Your Controller for Spring, Summer, and Fall
Proper controller adjustments address the seasonal water needs that layout planning alone cannot solve. Spring requires frequent, shorter cycles as temperatures rise and grass actively grows. Summer demands increased watering duration and frequency, since heat accelerates soil moisture loss and plant transpiration. Fall needs gradual reduction, matching declining growth rates and cooler conditions.
Controllers offer seasonal programming options that shift water schedules automatically. Homeowners should modify runtime length, frequency, and start times quarterly. Spring might require watering three days weekly, summer four to five days, and fall two to three days.
Adjusting controllers prevents overwatering during cool periods and underwatering during peak heat. This practice reduces water waste considerably while maintaining landscape health throughout the year.
Fix Dry Patches and Overwatered Areas
Identifying problem areas in a landscape reveals where the sprinkler system distributes water unevenly. Dry patches typically appear near trees, under eaves, or along property edges where sprinkler coverage falls short. Overwatered zones develop in low spots, near sidewalks, or where sprinkler heads overlap.
To address dry patches, homeowners can relocate existing sprinkler heads, add new heads to increase coverage, or adjust spray patterns and distances. Overwatered areas respond to reduced watering duration, repositioning heads away from problem spots, or installing separate zones with independent timers.
Observing the landscape after watering helps identify these issues. Brown, dormant grass indicates insufficient water. Soggy soil, fungal growth, or consistently wilted plants despite moisture suggest overwatering. Making these adjustments improves plant health and conserves water throughout the growing season.
Budgeting for Installation vs. Professional Design
Once a homeowner understands how to fix problem areas in their existing system, the next consideration becomes the overall cost of installation or hiring a professional designer.
DIY installation typically costs between $1,500 and $3,000 for a basic residential system, while professional design and installation ranges from $3,000 to $6,000 or more. Homeowners should evaluate their budget, property size, and soil complexity when deciding.
Professional designers assess soil type, water pressure, and landscape layout, reducing the risk of costly mistakes. They provide detailed plans and warranty coverage. DIY approaches save money but require research and equipment investment.
Small properties under one-quarter acre may suit DIY methods. Larger lots or complicated terrain benefit from professional expertise. Comparing quotes from three to five local contractors helps homeowners make informed financial decisions.
Frequently Asked Questions
How Often Should I Replace Sprinkler Heads and System Components?
Homeowners should replace sprinkler heads every three to five years, depending on water quality and usage. System components like valves and controllers typically last ten to fifteen years. Regular inspection helps identify wear earlier.
What Permits or Regulations Do I Need Before Installing a Sprinkler System?
Homeowners typically need to contact their local building department to obtain necessary permits. Requirements vary by location but often include inspections, water meter compliance, and adherence to irrigation codes. Some municipalities mandate backflow prevention devices.
Can I Install a Sprinkler System Myself or Hire a Contractor?
A homeowner may install a sprinkler system independently if possessing adequate knowledge and skills, though hiring a licensed contractor secures proper design, installation, and compliance with local codes. Professional installation often guarantees peak system performance and functionality.
How Do I Winterize My Sprinkler System to Prevent Freeze Damage?
Studies show frozen pipes cause approximately 9% of homeowner insurance claims annually. Homeowners should drain all water from lines, blow out remaining moisture with compressed air, and insulate above-ground components before temperatures drop below freezing.
What’s the Difference Between In-Ground and Above-Ground Sprinkler Systems?
In-ground systems feature buried pipes and fixed spray heads, offering aesthetic appeal and even coverage. Above-ground systems use portable hoses and sprinklers, providing flexibility and easier installation for temporary or rental properties.
Conclusion
Ironically, the simplest sprinkler systems often outperform complex ones, yet homeowners frequently overcomplicate their designs. Understanding water pressure, spacing, and zoning prevents costly mistakes that waste both water and money. A properly designed system requires minimal adjustments and maintenance, contradicting the assumption that lawn irrigation demands constant intervention. By following these foundational principles, homeowners achieve efficient, healthy landscapes through straightforward planning rather than elaborate solutions.