
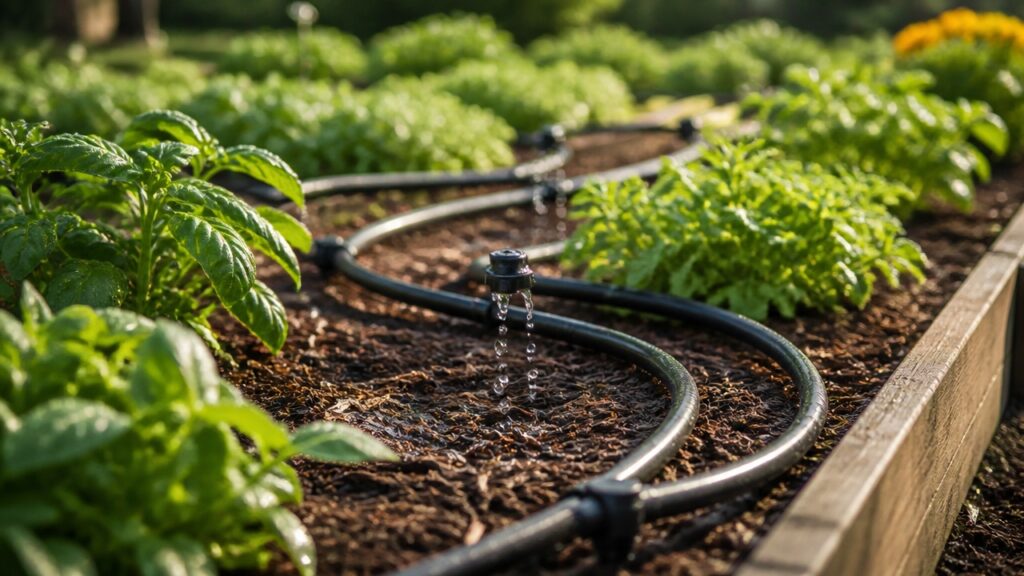
Picture this: it’s summer, your garden is thriving, but your water bill tells a different story. Drip irrigation systems solve this problem by delivering water straight to plant roots instead of spraying it everywhere. You waste far less water while keeping your plants happier and healthier than ever before.
Getting started is simpler than you might think. Measure your garden beds, group plants that need similar amounts of water, and pick the right equipment like soaker hoses or drip tape. Each choice shapes how efficiently your system works and how much water you actually save over time.
The real magic happens during installation. Map out your tubing carefully around existing plants, connect everything to your water source, and adjust your watering schedule based on your soil type. A little planning upfront saves you from frustration and creates zones that work with your garden’s natural flow.
What makes this approach so appealing is how it adapts to what you already have. Rather than ripping out your current layout, drip irrigation fits right in and improves things from there.
Once it’s running, you’ll notice the difference in both your garden’s growth and your peace of mind.
Measure Your Garden and Identify Watering Zones
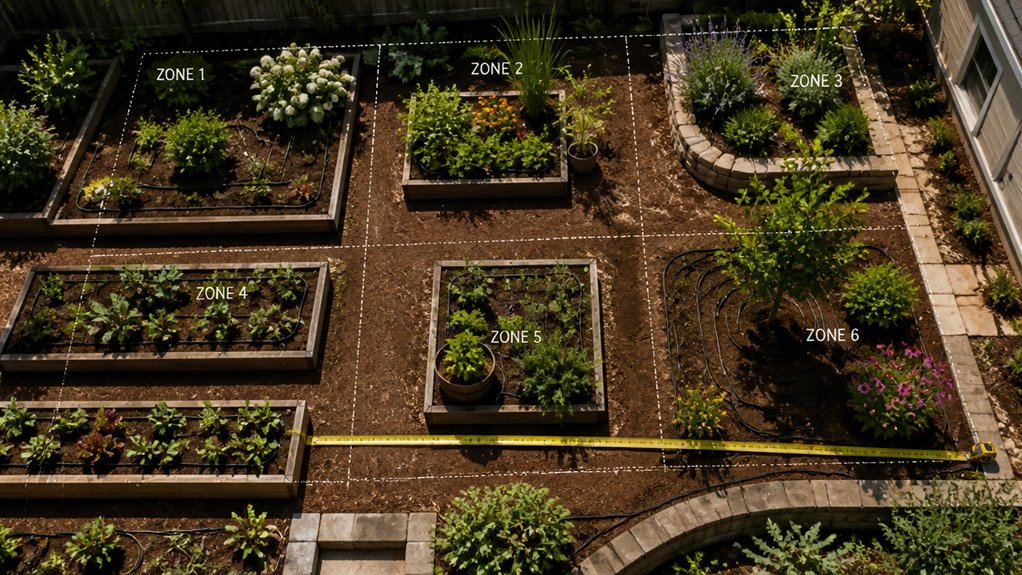
Proper measurement forms the foundation of an effective drip irrigation system. Gardeners should measure garden length and width using a tape measure, recording dimensions in feet or meters. Identifying watering zones involves grouping plants with similar water needs, such as vegetables, perennials, and shrubs, into separate sections.
Each zone requires assessment of soil type, sunlight exposure, and plant spacing. Sandy soil drains faster than clay soil, affecting water delivery rates. Plants positioned in full sun need more frequent watering than those in partial shade. Spacing between plants determines emitter placement and line routing.
Sketching the garden layout on paper helps visualize zones and plan irrigation line placement. Accurate measurements prevent installing excess tubing, reduce water waste, and guarantee uniform coverage across all planted areas.
Choose Your Drip System Type (Soaker Hose, Micro-Tubing, or Drip Tape)
Choose Your Drip System Type (Soaker Hose, Micro-Tubing, or Drip Tape)
Three main drip irrigation options exist for garden beds: soaker hose, micro-tubing, and drip tape.
Soaker hose, made from recycled rubber or vinyl, releases water slowly along its entire length. It works well for straight rows and curved beds, though it covers broader areas than other systems.
Micro-tubing delivers water through small emitters spaced at specific intervals, offering precise control for individual plants. This option suits vegetable gardens and container clusters effectively.
Drip tape features pre-punched holes or emitters built into flat plastic strips. It covers wide areas efficiently and works best for densely planted beds.
Each type connects to a main water line and timer. Soaker hose costs least, while micro-tubing provides accuracy, and drip tape balances coverage with efficiency.
Connect to Your Water Source (Faucet, Timer, and Pressure Options)
Connecting a drip irrigation system to a water source requires selecting the right faucet, timer, and pressure regulator for the garden bed setup. Most systems attach to outdoor faucets using standard threaded connectors. A timer, such as a battery-operated or electronic model, automates watering schedules and reduces manual effort.
Pressure regulators reduce water force from typical household faucets, typically 40-60 PSI, down to the 20-30 PSI range that drip systems require. Without regulation, emitters clog or spray unevenly. Backflow preventers protect municipal water supplies by blocking reverse water flow. Filtering options remove sediment that damages small tubing.
Garden hoses connect main lines to faucets, while quick-connect couplers allow easy attachment and removal. Proper connections guarantee consistent water delivery throughout garden beds.
Map Routes Without Disrupting Existing Plants
Before laying drip irrigation tubing through garden beds, the gardener should map out routes that avoid existing plants, roots, and soil amendments. Using garden sketches or photographs, mark the locations of perennials, shrubs, and vegetable rows. This planning step prevents damage to established root systems and reduces transplanting needs later.
Consider pathway options along garden edges, between planting rows, and around trees. Identify underground obstacles like irrigation lines, electrical cables, or buried stones. Note seasonal growth patterns; plants expand as they mature, requiring wider spacing around tubing than initial planting size suggests.
Shallow trenches, mulch coverage, or raised pathways can protect exposed drip lines. Testing the mapped route by laying tubing above ground allows final adjustments before permanent installation.
Install Tubing and Emitters Step-by-Step
Once the mapped route is finalized and the garden bed is prepared, the gardener lays the main drip line along the planned pathway. The tubing, typically made from polyethylene or vinyl, connects to the water source at one end. Along the main line, the gardener inserts drip emitters at intervals matching plant spacing.
Emitters come in various types: drip stakes for individual plants, inline emitters built into tubing, and soaker hoses for continuous coverage. The gardener punctures the tubing with a punch tool where each emitter attaches. Spacing depends on plant needs; tomatoes may need emitters every two feet, while groundcover requires closer intervals.
End caps seal the tubing line. Pressure regulators protect the system from excessive water force, ensuring consistent, even distribution throughout the garden bed.
Fine-Tune Your Watering Schedule for Plant and Soil Type
After installing the tubing and emitters, the gardener must determine how often and how long to run the system based on specific plant requirements and soil conditions. Tomatoes and peppers typically need daily watering during hot months, while established perennials require less frequent irrigation. Sandy soils drain quickly and need more frequent watering cycles, whereas clay soils retain moisture longer and require fewer applications.
A basic schedule might run the system for 30 minutes every other day for vegetable beds, adjusting as needed. Observing soil moisture at 6 inches deep helps confirm if adjustments are necessary. Morning watering sessions reduce disease risk by allowing foliage to dry quickly. Seasonal changes require schedule modifications, with reduced frequency during cooler months and increased duration during peak summer heat.
Troubleshoot Common Clogs, Leaks, and Pressure Problems
Drip irrigation systems encounter three main operational issues: clogged emitters, water leaks, and inadequate pressure. Clogged emitters result from sediment, mineral deposits, or algae buildup, requiring inspection and cleaning of affected lines. Water leaks typically occur at connection points, damaged tubing, or punctured emitters, necessitating replacement of compromised sections.
Inadequate pressure stems from undersized main lines, excessive tubing length, or too many emitters on a single circuit. Gardeners should check water source pressure with a gauge, as most systems require 20-30 PSI for ideal function.
Regular maintenance prevents many issues: flushing lines periodically removes debris, installing filters protects emitters, and inspecting connections catches problems early. These preventive measures extend system lifespan and maintain consistent water delivery.
Calculate Water Savings and Long-Term ROI
Water conservation represents a measurable financial advantage of drip irrigation systems compared to traditional sprinklers. Drip systems deliver water directly to soil, reducing evaporation and runoff by 30 to 50 percent. A typical garden bed using overhead sprinklers consumes approximately 1.5 inches of water weekly, while drip irrigation requires only 0.5 to 1 inch.
Calculating long-term return on investment involves comparing installation costs against water savings. A basic drip system costs $200 to $500 for a 400-square-foot bed. Monthly water bill reductions typically range from $10 to $25, depending on local rates and garden size.
Over five years, savings accumulate to $600 to $1,500, offsetting initial expenses. Lower maintenance demands further reduce long-term costs through decreased repairs and replacements compared to conventional watering methods.
Frequently Asked Questions
Can I Use Drip Irrigation in Containers and Raised Beds Alongside In-Ground Garden Beds?
Yes, drip irrigation systems can effectively serve containers and raised beds alongside in-ground gardens. Gardeners often combine these applications using flexible tubing and adjustable emitters, creating a unified watering solution that accommodates multiple growing environments within one property.
What’s the Best Time of Year to Install a Drip Irrigation System in My Garden?
Spring and fall represent ideal installation periods for drip irrigation systems. Spring allows gardeners to establish systems before peak growing season, while fall provides cooler temperatures that reduce installation stress. Early spring installation proves most practical for most regions.
How Do I Winterize My Drip Irrigation System in Cold Climates to Prevent Freeze Damage?
One should drain all water from lines and components before freezing temperatures arrive. Flushing the system thoroughly removes residual moisture. Disconnecting and storing above-ground parts indoors prevents ice damage and extends equipment lifespan considerably.
Are Drip Systems Compatible With Organic Gardening Practices and Fertilizer Applications?
Drip systems are compatible with organic gardening. They deliver water directly to plant roots, reducing waste. Gardeners can apply organic liquid fertilizers through drip lines using injectors, ensuring efficient nutrient distribution while maintaining organic certification standards.
Can I Expand or Modify My Drip Irrigation System Later Without Replacing the Entire Setup?
Yes, drip systems can be expanded or modified without full replacement. Gardeners can add emitters, extend tubing, and adjust layouts as needed. Most systems use standardized components that connect easily, allowing incremental upgrades over time.
Conclusion
Drip irrigation systems deliver water directly to plant roots, reducing waste while maintaining consistent moisture levels. Studies show drip systems use 50% less water than traditional sprinklers, lowering utility bills considerably. By measuring garden dimensions, grouping plants by water needs, and installing appropriate tubing, homeowners create efficient watering zones. Regular maintenance prevents clogs and pressure issues, ensuring long-term performance and healthier gardens with minimal environmental impact.